Golden Apricot Jam – Enjoy the sweet taste of golden summer apricots all year long with this delicious apricot preserves canning recipe!
Note: This post contains Amazon Affiliate links. For every sale made after a reader clicks through from my website, I get a small commission. The profits go toward continuing to make Simple Seasonal possible!

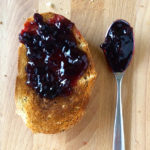
When it comes to making a mess in my kitchen I always find the homemade jams are always worth the sticky splatters and the inevitable clean-up time. Apricot jam is no exception. This recipe is my new favorite spreadable fruit. Seriously, “I can’t get enough of this stuff” she says, as toast pops destined to be smothered in sweet, sticky gold!
After making this recipe I immediately cracked open one jar for instant gratification. The remaining 4 jars have been squirreled away for the winter when good stone fruit is all but impossible to find.
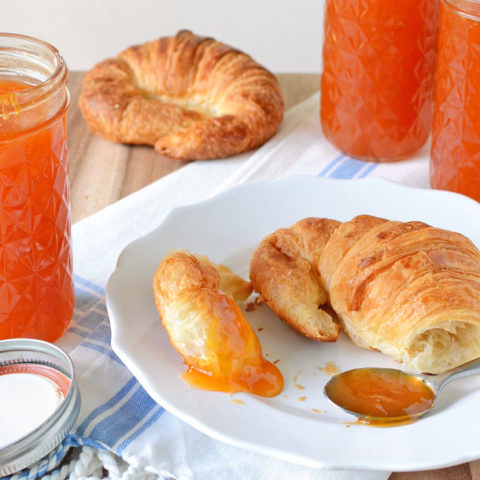
Imagine enjoying a fresh croissant dripping with Golden Apricot Jam while watching snow fall outside your kitchen window on a chilly February morning… Thank goodness for preserves!
When it comes to making jam, it’s very important to get your fruit from a local orchard so that you have the sweetest, juiciest, most flavorful specimens that haven’t been harvested too early.
I got my apricots from Solebury Orchards in Bucks County, PA while on a blueberry picking/eating excursion. I patiently let them ripen until they were almost ready to spoil because this makes the most flavorful jam.

My little one couldn’t get enough of the sweet, fresh fruit. I eventually had to place them out of his reach so that I would have enough for my jam!

The first step in jamming is cleaning, peeling, and smashing your fruit. After this, all you have to do is add is a little lemon juice and a lot of sugar.

My apricot jam is a pectin-free recipe. That means it’s gelled using a candy-making technique. AKA… yummy fruit + lots of sugar + insanely high temperatures = changed molecular structure and perfectly gelled jam!
Sorry… I like science. Basically, this means you’ll NEED a candy thermometer for this recipe. If you don’t get your jam hot enough it won’t gel, and if it gets too hot you’ll have candy on your hands.
Unless you’re a well-experienced, freakishly intuitive professional confectioner, you’ll need a way to objectively tell wether you’ve brought your jam to the “gelling point.” This may sound intimidating, but if you have a thermometer and you can read numbers, it’s pretty straightforward.
Pictured is a Taylor thermometer, which I have been very happy with. I haven’t been able to find this exact one for sale, but I recommend one with a clip for the side of your pot and with “cheats” that tell you when you’re in the candy making zone.
I really like the Taylor Candy Deep Fry Jelly Thermometer available on Amazon. It’s simple, well priced, and good quality. Just be careful not to touch it when it’s hot, because it doesn’t have silicone safe touch areas like the one I have pictured.
Another option is the Taylor Connoisseur Line Candy-Deep Fry Thermometer, which has the silicone for easier handling, but is not as well-reviewed. The nice thing about Taylor thermometers is that if you run into any problems, they have a lifetime warranty!

Gelling point in most places is 220ºF. If you live at a high elevation, plan on bringing your jam to 228ºF. It can take a while to get your jam to that high of a temperature, so you will need to continuously stir the jam slowly while scraping the bottom of the pot with a wooden spoon to keep it from burning.
By the time you get your jam to gelling point it will look like molten lava and there will be tasty jam splatters all over your stove top. Be sure to keep kids and pets out of the kitchen and be very, very careful! I don’t want anyone to get burned!

After brining the jam to gelling point it’s ready to be canned in a water bath canner (glass jars in boiling water). The jam will still appear quite thin when you spoon it into your jars, but don’t fret. It won’t be fully set for 24 hours.
If, by some sad tragedy, your jam doesn’t set, all is not lost. Simply dump all the jam back into a pot, bring to gelling point again, and then re-can in a hot water bath. If you have gelling problems, chances are you didn’t get your jam hot enough during the first go around. Use a thermometer so this doesn’t happen to you!
For more pictures about the water bath canning method check out my recipe for Cherry Almond Jam.

Your jam will be shelf-stable for 12 months. Store in a cool, dark place with the rings off of the jars, so that moisture doesn’t get trapped under the sealed lid. After opening a jar, store it in the refrigerator for up to a month, but I doubt it will last that long!

Just imagine having this in your pantry this Winter to pull out on a cold day when you’re longing for Spring to come!


The flaky croissants are from Bakers On Broad in Souderton, Pa. Enjoy the sweet taste of golden summer apricots all year long with this delicious apricot preserves canning recipe! Your jam will be shelf stable for 12 months. Store in a cool dark place with the rings off of the jars, so that moisture doesn't get trapped under the sealed lid. After opened, store in the refrigerator for up to a month, but I doubt your jam will last that long!
Golden Apricot Jam
Ingredients
Tools
Instructions
Notes
Serving size reflects 1 Tbsp of jam.

More canning recipes…
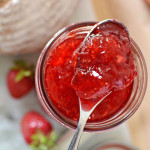
Strawberry Lemon Jam
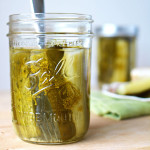
Crunchy Dill Pickles

Small Batch Refrigerator Pickled Beets


I would love to pull this out of my pantry in the winter, spring, summer or fall. It looks wonderful!
Thanks Kelly. I just love having my own preserves on hand. Not just because they taste better, but bring back good memories of picking fruit with my little one, sticky fingers, and warm summer days!
This looks divine! I once made a honey apricot butter (using dried apricots) for Serious Eats, and it remains one of my favorite preserves of all time.
Thanks Lucy! I really can’t get enough of the the stuff. That’s so cool that you got to do a recipe for Serious Eats!
This looks like a perfect summer accompaniment. Yum.
Thanks! I’ve been spreading it on everything I can think of!
If I don’t want to put in jars can it still be done? Where else can I store it I plan to use it all up with in days.
You can store the jam in any container with a lid. Glass or plastic will work. That said, be sure to use the jam up in a couple of weeks as it will not have been preserved with heat!
Looks fantastic and will be making some but please help me with the Ingredient quantities – what does the ‘C’ mean after the measurement??????
“C” stands for a U.S. Customary Cup. Happy jamming!