
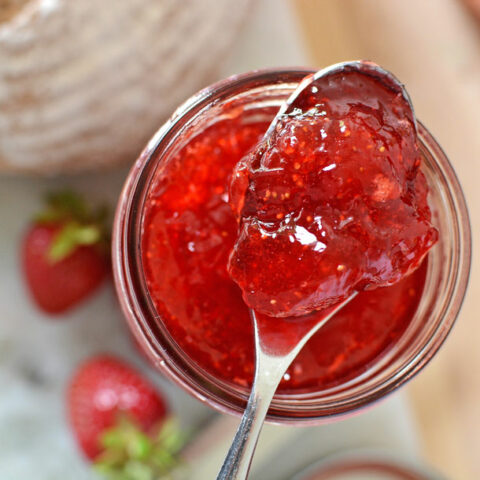
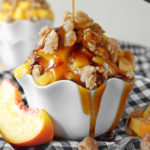
Before you click through thinking, “Oh, just another jar of classic strawberry jam,” I just want to say that my jar of jam has become a delicious labor of love. Not to toot my own horn (well, maybe a little), but it’s the result of numerous seasons and batches of experimenting with different sugars, pectins, strawberry ripeness, and lemon ratios to achieve what I feel is the ideal jar of strawberry jam. It might seem silly to put so much effort into jam, but trust me – when you open up a jar of the good stuff in the middle of January, it will all make sense…
For this recipe I started with the Strawberry Jam recipe that can be found in the Ball Blue Book, and over time deviated a little bit from the original. Ultimately, this delicious jam is all about the right ingredients.
1. Berries: First things first, you will need 2 quarts of amazing strawberries. Store-bought berries simply won’t do, and it’s best to get locally sourced berries in season. The ideal situation is to pick them yourself. You’ll want to look for the just-ripe berries that are dark pink all the way through, but not bright red and at the peak of ripeness. Contrary to what may be expected, I find that these very ripe berries result in runny, way too sweet jam. On the flip side, under-ripe berries make jam that lacks any kind of luster (a.k.a. berries from the grocery store).
2. Sugar: My preference is organic cane sugar. I find it behaves better with my pectin, not to mention it’s not chemically treated, and is subsequently, despite being sugar, a healthier choice. I’ve also tried low sugar versions of strawberry jam and have decided that the full sugar is worth the calories, at 7 cups of sugar per batch.
3. Pectin: The Ball Blue Book recipe naturally calls for Ball’s pectin. I’ve tried Ball, Pomona’s, and Sure Jell, both liquid and powder pectin. For strawberry jam I’ve settled on 1 packet of Sure Jell powdered Premium Fruit Pectin.
4. Lemon: Don’t be tempted to cut corners on this one and buy bottled lemon juice, as it has a different flavor and it has additives to make it shelf stable. You’re already putting the effort into canning, you might as well squeeze your own lemons. The Ball Book calls for 1/4 C of lemon juice. I find this is just barely a tad tart, so I measure 1/4 C, remove approximately 1 Tbsp, and then I’m satisfied.
Despite my specific opinions about strawberry jam ingredients, it’s actually pretty easy to make, and a good place to start if you’re new to canning. If you’re feeling a little skeptical about the merits of making your own jam, just scroll down and imagine this deliciousness in your own kitchen…

A couple of pouty faces; one wanted to lick the butter, the other wanted jam on toast, but they both had to wait until I was done taking photos.

Freshly baked bread from The Bread Box and Bakery. Check it out if you’re ever in PA visiting beautiful Buck’s County!


If you’re new to canning, I highly recommend purchasing a basic canning utensil set. These inexpensive and helpful tools will make the job much easier. With home canning, food safety is first priority. Although food poisoning from home canning is uncommon it is important not to eat if a seal becomes broken or the lid is bloated. It is normal for the color to fade after a number of months, but if the jam is not even in color, or new specks are noted in a stored jar, do not eat. Jam is very shelf stable and this is not likely to happen, but always remember to look first, and then eat.
Strawberry Lemon Jam
Ingredients
Instructions
Notes
Serving size of reflective of approximately 1 oz of jam.


That looks great! And I agree, store bought strawberries are just useless. Water in shape of strawberries. When available (unfortunately not quite every year) I make jam with the strawberries growing in my mother-in-law’s garden. If not I go picking on the field, they are better than those coming from Spain but still I worry a bit about them being too full of chemicals… I posted a strawberry-rhubarb jam recipe myself yesterday. 🙂
Thanks Adina! I’m lucky enough to be a member of a chemical-free CSA where I was able to pick my own berries, so for a few short and delicious weeks I pretty much eat the good stuff until I’m sick. I checked out your Rhubarb Strawberry Jam and it looks gorgeous!
That looks fantastic Rachel! I would like a slice of bread with your strawberry jam right now!
Thanks Nicoletta! Homemade jam is dangerously good stuff!
I accdentally added 1/2 cup lemon juice. The flavot is fabulous but it is more like ice cream topping. The berries were perfect though. I want to make another batch. Any suggestions on how to thicken better and still keep the same amount of lemon? My husband loves it!
Oooo… Sounds like a nice, tart strawberry jam! With adding more juice you adding more liquid volume, so you’ll want to try adding more pectin next time. I would try adding an additional 2 tsp. This will still work as far as food safety is concerned because lemon juice is a natural preservative. Also, just a thought… If you’re new to canning make sure you’re heating the pectin enough before jarring your jam. You’ll want to bring the fruit and pectin to a rolling boil, add the sugar, and then return to a rolling boil for a full minute before jarring your jam. Best of luck!